If you’re tired of tripping on your carpet, seeing loose edges, and are bothered by how poorly it fits in your rooms, it might be time for action! Once you learn how to stretch your carpet, you can save from a few hundred up to thousands of dollars and make your flooring look fabulous again.
In this comprehensive guide, you’ll find out more about the common reasons that cause carpets to shrink and a few beneficial tips to prevent shrinkage. If you’re not sure whether your carpets need stretching, we also included a few signs to look for.
Now, let’s get to work!
- Reasons Why Carpets Shrink
- How To Know Your Carpets Need Re-Stretching
- How Do You Stretch Carpet?
- Tips To Avoid Carpet Shrinkage
- FAQs
- Conclusion
Reasons Why Carpets Shrink
Why do carpets shrink, leaving parts of the floor exposed? If you have wall-to-wall carpets and you’re not sure why they tend to appear smaller than before, there are a few things to consider.
Although carpets are made to last a long time and to withstand high-frequency traffic, it’s understandable that they won’t fit the same after many years of use. Although carpet re-stretching can be considered a normal maintenance step, you should know which factors can lead to your carpets shrinking prematurely.
Moisture
Moisture and humidity are the top factors that can cause your carpets to shrink. Using too much water when cleaning or not taking care of spills right away can eventually lead to a smaller carpet that doesn’t reach the walls.
A humid room is another reason your wall-to-wall carpets might not fit the same way they did before. If you live in a humid environment, it’s not uncommon to have to re-stretch your carpets from time to time. As the fibers are exposed to humidity, they will shrink, leaving your beautiful carpets not fitting properly on the floors.

Also, homeowners who live in regions with dramatic temperature changes should be aware of the possibility of carpet shrinkage being a problem.
Improper Cleaning
Unfortunately, many homeowners are not familiar enough with the materials their carpets are made of and how to properly clean them. Because of this, the top reason that carpets shrink is improper cleaning and care techniques. This can happen both to homeowners and professional carpet cleaners, so if you’re interested in hiring someone make sure to find trained and experienced professionals who know exactly what they’re doing.
The first mistake most people make is using hot water. Steam cleaning carpets is a great solution for when you want to deep clean them; however, when the water is too hot the fibers can shrink.
Next on the list is excessive exposure to water. Some stains do indeed require a more aggressive approach than others, but soaking your carpets for hours without following the proper steps can have consequences. First of all, your carpets will take ages to dry, and they will eventually shrink if left damp. Secondly, using extra water and extra cleaning solution isn’t always the right way to target heavy stains because it can cause damage to the carpet fibers.
In cases where you have a stubborn stain and you want to treat it, avoid soaking the carpets for days. Instead, you can turn to a professional service and ask them to clean the carpets and dry them. Professionals have powerful machines that will do the job with ease without shrinking.
Natural Fibers
Carpets made of natural fabrics are fabulous and can be a great addition to your home décor; however, what most homeowners forget is that natural fibers have a tendency to shrink when exposed to water. When caring for your high-quality carpets, you should read the maintenance instructions carefully and ensure that your gorgeous natural fiber carpets are always dried quickly.
If you hire professionals to do the cleaning, let them know that your carpets are made of natural materials, just as a precaution. The smartest thing you can do is search for a company that specializes in cleaning natural fiber carpets and contact them.
Back To TopHow To Know Your Carpets Need Re-Stretching
Are there any tale-tale signs that will let you know when your carpet needs re-stretching? Aside from the obvious one that what used to be a wall-to-wall carpet doesn’t even reach the walls anymore, there are a few other factors:
Check The Corners
In some cases, the carpets won’t fit properly anymore but you won’t see them completely separated from the walls. Regular maintenance requires checking the corners to see if your carpets are due for re-stretching.
In general, carpets are secured to the sub-floor so that they can’t move. If the corners are loose and aren’t fixed, that means that your carpets have changed position and aren’t the same size they were when they were installed. You can also check the same thing by looking at the carpet edges around the room.
Damage
As your carpets get older, it’s completely normal to notice some damage; so what kind of damage will point out that you need to stretch them? If any major damage happens, such as a cut, the carpets will become looser and they won’t fit as well anymore.
If you leave them unrepaired, the condition will worsen over time. You’ll see buckles, curled edges, etc. This is the best time to re-stretch them and restore their fit. In most cases the carpets will also need repairing, so if you’re not sure what to do the best bet is to contact professionals.
Wrinkles
Wrinkles and buckles on carpets are common and are generally a sign that the carpet needs to be stretched. Buckles and lumps appear due to foot traffic, moving heavy furniture by dragging and sliding it, and everyday use. When these bubbles appear, you should consider stretching the carpet to bring it back to its old size and fit.
Back To TopHow Do You Stretch Carpet?
- 1. Clean The Carpet And The Room
- 2. Peel The Carpet Back
- 3. Remove The Tacks/Tack Strips
- 4. Place New Tack Strips
- 5. Set The New Padding
- 6. Use A Power Stretcher
- 7. Add A Knee Kicker
- 8. Trim The Carpet
How to stretch your carpet at home without damaging it? We put together a guide that will take you through every step of the process.
1. Clean The Carpet And The Room
Before you roll up your sleeves to bring the carpet back to its old glory, you should clean the room and the carpet. Start by removing all the furniture you can. If there are any heavy objects or built-in pieces you can leave them in the room, but they can make your work significantly harder.

To successfully restore the carpet size, you need to get rid of at least 50% of the furniture. You can choose to do the stretching without removing the furniture; however, it will take you a lot of time, and the final result won’t be ideal. Also, be very careful when stretching the carpet in areas with furniture because heavy furniture can pull on carpets and cause rips.
When you’re done removing things from the room, grab the carpet vacuum cleaner. Go over the entire carpet surface, ensuring that it’s clean.
2. Peel The Carpet Back
Find your work gloves and put them on! Pulling the old carpet back is the first step of the process, starting from one corner and going through the entire perimeter of the room. You have to pull back the carpet on three walls in the room and leave it fixated on one wall.
Carpets that need re-stretching will often have curled edges or corners, so that’s the easiest place to start. First, grab your pliers and start separating the carpet from the tack strip. Don’t use too much force; instead, be gentle to prevent rips and other damage. Next, use the pliers to remove the tacks or tack strips that are nearly always nailed down near the walls and the carpet edges.
The first few sections will be the hardest to peel, but once you get the hang of it and release the first corner, it will be much easier. Some people prefer to use only their hands, but professionals recommend using pliers. These are excellent for separating the tack strips without leaving holes in your carpet or causing damage to the underlying flooring.
Once you’re done ripping up the old carpet, remove all the remaining tacks that are still fixated to the padding. You should double-check that you’ve removed all the tacks and staples; otherwise, you’ll damage the padding when you lift it up. Once you’re sure it’s completely free, lift it off as well.
3. Remove The Tacks/Tack Strips
Your carpet is almost certainly secured to the floor using tacks/tack strips. Once you’ve removed the carpet on three sides of the room, you can tackle the tack strips using a screwdriver or a hammer. Place your tool right under the strips, and use light force to remove them.
Keep working with your gloves on to prevent injuries from the sharp tacks. Once you’re done, gather all the old strips in a bucket and remove the bucket from the room. Next, clean the floors and carpets to prepare a neat surface for the next step.
4. Place New Tack Strips
Cut new tack strips to fit the wall dimensions and start installing them. They should be located between ¼ to ½ inches away from the wall. When nailing them down, make sure that the gripping side is pointing toward the wall.
There shouldn’t be any gaps in between the sections of strips.
5. Set The New Padding
You can now reset the padding! It should fit right along the tack strip. If you notice that the padding is longer than required, you can use a utility knife to cut it so that it fits properly.
When you’re done setting it, you should staple the padding to the floor every 3 inches. If you notice that the padding is very damaged, you can substitute it with a new one.
6. Use A Power Stretcher
Finally, the step you have all been waiting for. Re-stretching a carpet requires a special tool called a power stretcher. You can buy one online or in the nearest home improvement store, or you can also consider renting one.
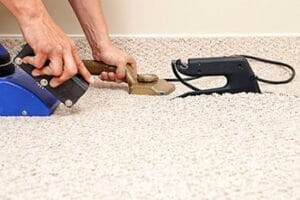
A power stretcher is a tool that will grab the carpet with its prongs and pull on it. The other side of the stretcher should be located on the opposing wall so that it anchors the tool in place.
Aside from a power stretcher, you can also get a knee kicker. This tool is ideal for tighter spots where you simply can’t place a stretcher. Another great use of the knee kicker is as a final tool to finish off the stretching process after the power stretcher.
Once you’ve got the necessary tools, place the carpet on top of the padding and set the power stretcher. First, install the base of the tool on the wall where the carpet is still fixated to the floor. The stretcher is expandable, so you should be able to easily lengthen it to reach the opposite wall.
The head of the tool should be around 6 inches from the edge of the loose carpet. First, ensure that the carpet is entirely flat, without any wrinkles or bumps. Next, press the stretcher down and push the lever’s teeth to penetrate the carpet.
The best way to know that you have installed the power stretcher correctly is to test the pressure. If pushing down the lever is too easy, then you should stretch it more. If the pressure is too hard, then you risk ripping the carpet.
Thankfully, the tool allows you to control the tension, so you can easily adjust it to your needs after you’ve installed it.
7. Add A Knee Kicker
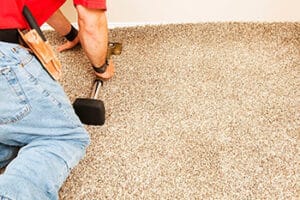
As we mentioned before, the knee kicker is perfect for parts of the room where the power stretcher won’t fit. Just like the stretcher, you should use the knee kicker about 6 inches away from the wall. Place it on the carpet, and steady it with the part of your leg located above the knee.
8. Trim The Carpet
Once you’ve stretched the carpet, there might be parts that you have to trim. Get on your knees, grab a carpet cutter and take care of any extra length. Press the ends underneath the baseboard, and your work here is done!
As you can see, carpet stretching doesn’t require expertise, but you’ll definitely need to go over this guide a few times. The process also requires special tools, and if you have any questions about using them, the shop assistants in the home equipment store are usually happy to answer them.
Back To TopTips To Avoid Carpet Shrinkage
Is there any way that you can prevent carpet shrinkage? Stretching the carpet is a standard step of regular maintenance after years of use; however, you can do a few things to prevent the carpet from shrinking often and ensure that you’re giving it the best care.

Take Care Of Spills Right Away
Don’t leave liquid spills on your carpets! Instead, be sure to take care of them right away because they can shrink and cause damage to not only the carpets but also to your floors.
Work On Your Cleaning Routine
When cleaning your carpets, avoid soaking them in water or using water that’s too hot. If you use water or steam, ensure that your carpets are fully dry when you are finished. Carpets made of natural fibers require a gentler approach.
Contact Professionals
If you’re not sure how to properly treat your carpets, aren’t familiar with the right cleaning methods or solutions, or don’t have enough time to practice the proper cleaning routine, get in touch with professional cleaners.
Back To TopFAQs
Yes! If you’ve noticed that your carpet appears smaller than it used to and doesn’t feature the same wall-to-wall pattern, then you can DIY it! All you need to do is follow the steps we listed above.
How much does it cost to stretch carpets?
Most carpets need re-stretching after several years of use. If you want to turn to professionals for this purpose, you can expect to pay between $40 and $80 per room. The final cost will depend on various factors, including the room size, carpet material, damage, etc.
Conclusion
Have you noticed that your carpet doesn’t fit wall-to-wall anymore, and the floors beneath are exposed? If so, you should probably consider re-stretching the carpets and learning how to avoid this happening again.
The procedure of bringing carpets back to their initial size isn’t complicated, but it will require the special tools we mentioned before. After you’ve stretched your home carpets, they will look as good as new.
If you have any comments or first-hand experiences with re-stretching carpets, please post them below or share your pictures via our social media.
Back to Top
