Our expert editors independently review, test, and recommend products to help you make an informed decision. We may earn commissions on purchases made from our product links.
One of the attractions of tile floors is that they are durable and have a long lifespan. But your tile floor can start to look dated quickly if you don’t care for it correctly. Why? Grout.
While tiles are a durable, waterproof flooring option, the grout that sits between them is porous and can easily be discolored or even become moldy.
In order to ensure that your grout lasts even half as long as your tiles, it needs to be sealed.
Sealing is a way of waterproofing your grout and protecting it from the elements so that it lasts longer.
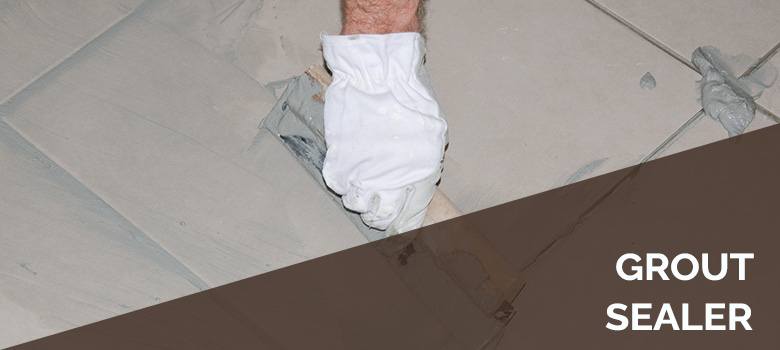
In this article we are going to go through, step by step, exactly how you seal your grout. We will talk about when to do it, how often to do it, what products to use, and how to apply grout sealer, so your grout doesn’t leave your expensive tile floor looking old before its time.
Is It Necessary To Seal Grout?
Yes, you need to seal your grout. Period.
OK, but why?
Grout is a mixture of sand and cement that is used to hold other building materials, such as tiles, in place. Your tiles will be installed on the floor (or wall) using mortar or mastic on the backside, and the grout sits between the edges of the tiles, holding them in place the right distance apart from one another. (So, no, your tiles will not fall off the walls if your grout starts to disintegrate.
There are a variety of different types of grout—for example, unsanded grout, sanded grout, and epoxy grout. Which one you use depends on the type of tile you have and at what distance apart the tiles are spaced.
But unlike your tiles, which are probably highly water resistant, grout is porous, so it absorbs water, bacteria, and stains. So, while your tiles stay looking fresh despite significant water exposure, your grout can quickly turn black, brown, or some other undesirable color.
In addition to the aesthetics, grout can become a breeding ground for bacteria and mold, and it can also lose its structural integrity through water exposure, meaning you’ll need to replace it.
So, what do you do? The answer: Seal your grout to ensure that it repels water, and therefore maintains its colors and remains free from germs.
So, like we said, yes, seal your grout. And here’s how.
How To Seal Grout
When To Seal Grout
You need to seal your grout shortly after it is installed, but do wait at least 48 to 73 hours to ensure the new grout is entirely dry and cured. At the latest, definitely do your first sealing within the first two to three weeks of installing the grout.
You will then want to reseal your grout regularly. Exactly how regularly depends on the environment the tiles are in. For example, standard floor and wall tiles that don’t see much water exposure probably only need to be sealed once a year. But for the tiles in your shower, you might want to seal the grout two or three times a year.
To know what is right for you, observe your grout and monitor its water exposure.
What To Use
There is a huge range of different grout sealers on the market, mostly at pretty affordable prices, so you should have no problem finding a solution. Further down in this article we have put together a list of the three best grout sealers you can buy.
There are generally two types of sealer: penetrating or non-penetrating.
Penetrating sealers are water-based formulas that soak into and bind with the grout, protecting it from the inside out. This means that it is best for grout with a lot of water exposure, such as in bathrooms.
Non-penetrating grout sealers work by forming a membrane coating on the surface of the grout, making a barrier that repels water. These work just as well, but they aren’t good for high moisture areas, as they will not allow any water trapped beneath the grout to evaporate. Trapped water can cause a lot of problems. But this type of grout sealer is best for unglazed tiles, as penetrating grout sealer can stain the tiles.
While we have already identified three excellent options below, there are a number of key things to look for when assessing any grout sealer, aside from whether it is penetrating or non-penetrating.
- Does it leave behind a chemical residue? Ideally, the answer to that question would be no. But, while a cheaper sealer that leaves behind a residue might be suitable for a large outdoor area that is tiled, it would be entirely inappropriate for your kitchen, as a food preparation area.
- Does it emit VOCs? VOCs are volatile organic chemicals that some materials release into their air upon installation and can be dangerous to inhale until they dissipate. Again, while this might be acceptable for an outdoor area or well-ventilated space, you will not want to use this in the bathroom, generally a small space and one that is rarely vacant for long.
- What kind of tiles do you have? Not only will some tiles be more sensitive to certain sealing agents than others (for example, unsealed tiles don’t like penetrating sealers), but the type of tile you have will indicate the type of grout you have. So, look for a product that is appropriate for the type of tile floor you are working with.
- Is the sealer waterproof? Wait, isn’t the whole point of sealer to be waterproof? Well, yes, but some will be more water-resistant than others. Check how much water the sealer can tolerate, and select more potent options for spaces that are likely to be exposed to a lot of water.
How To Apply
How exactly you apply your grout will depend on the product you choose and the kind of coverage you want.
For example, if you have unglazed tiles and a sealer that works for both grout and tiles, you might want something that allows you to distribute the sealer liberally across both surfaces. But if you have tiles that can be discolored by sealer, you will want a method that allows you to ensure that, as much as possible, you are just covering the grout.
Sealer generally comes as a paint or a spray.
For a paint, you will want to apply with a brush or roller. While you will get a more even spread over a large area with a roller, a brush is a better choice if you are trying to do detailed work.
If you are trying to avoid getting sealer on your tiles, keep a cloth handy and wipe up overspill as you go.
While some sealers say they are safe to apply over the top of tiles, it can damage your tiles, especially if they are unglazed, so it is worth avoiding. Keep a cloth on hand to wipe up any spills as they occur.
The spray method is very similar. You can either spray generously and clean up later, or spray with more purpose and maybe use a brush as well to help spread the sealer more evenly.
You want to apply a pretty generous layer of the sealer, as porous grout will actually need quite a bit of the formula.
Also make sure that you are consistent because, if you accidentally miss a section, you can end up with spots that quickly discolor and look different from the rest of your grout.
You then need to wait for the sealer to dry. How long this takes depends on the product you use, but 15-30 minutes is about standard.
You can then apply another coat of sealer if required. A minimum of two layers is generally recommended, but if you are resealing regularly, one coat may be enough.
If you didn’t do a very good job of cleaning up excess sealer as you went, you’ll want to clean your tiles now.
Some products will suggest that you can just mop up any excess liquid sealer and leave any other sealer to wear off naturally over time. But this isn’t really advisable. No matter how safe these products claim to be, you don’t really want flakes of it around your home in the coming weeks. Plus, in some cases, it might damage your tiles.
The best way to clean up without compromising your freshly sealed grout is to use even more sealer! Wet the floor with more sealer and use a brush to scrub the tiles, to remove any sealer that has adhered to them. You can then wash away the sealer mixture completely with water.
Make sure you prepare your space before applying. For example, tape off anything you don’t want to be exposed to the sealer. In your bathroom, this might be wooden baseboards or cabinets.
When you are fully done, try to avoid exposing your grout to water for at least 24 to 48 hours,to allow the sealer to completely dry and take full effect.
Not sure if you have successfully sealed your grout? Once it is dry, you can conduct a simple test by just flicking a few drops of water onto your grout. If the water puddles on top, you are properly sealed. If not and it soaks in, there is more work to be done.
You can use the same test to decide when it is time to reseal your grout.
3 Best Grout Sealers
We have tried a lot of different sealers over the years to maintain our tiles. We think these three are the best on the market at the moment.
1. Seal It Green Xtreme Impregnating Grout Sealer
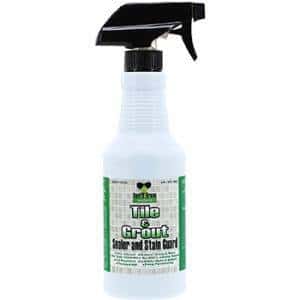
A relatively new product on the market, this green grout sealer will appeal to the environmentally and health conscious, as it is entirely non-toxic and gives off zero VOCs (volatile organic compounds) that can be damaging to your health.
This highly effective sealer is appropriate to use with grout that is holding tile, granite, marble, and natural stone, and in both interior and exterior installations, so it is a versatile solution for all your household needs.
It comes in a handy spray bottle that makes it super easy to apply, and it is both UV resistant and transparent, so it won’t change the natural finish of your flooring.
You can also use this sealer to clean grout that is starting to blacken or look old before applying as a new layer of sealer.
While the bottle is small, a little goes a long way, as one bottle will cover 100 square feet, making it excellent value for money as well.
2. More Grout Ceramic & Porcelain Sealer
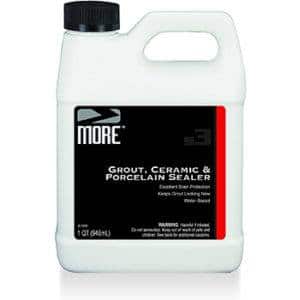
This premium sealer promises to both enhance the look of natural stone and tile and seal grout for maximum longevity. It will protect both grout and tiles from oil- and water-based stains, ensuring your surfaces look good for a lifetime.
It can also be used to prevent grout and pigment from penetrating the surface of tiles, which means you retain that “freshly laid” look for longer.
The sealer takes just 15 minutes to absorb, and you can simply wipe away any sealer that has not soaked in.
This formula is best used in a well-ventilated area, as it can give off some chemicals that are harmful when inhaled.
3. Miracle Sealant Impregnator Penetrating Sealer
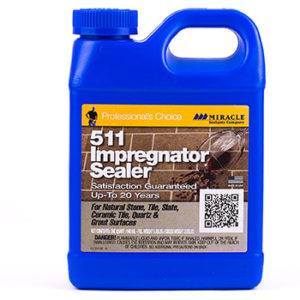
The most budget-friendly option on this list, just one pint of this sealer can cover up to 500 square feet, protecting grout against water, stains, and slippage.
It works on a variety of surfaces including sanded grout, ceramic tile, porcelain tile, glazed tile, stucco, travertine, marble, slate, granite, and terrazzo.
The formula is easy to apply and doesn’t leave behind any colored residue, but creates a barrier that protects against both water and oil, and will prevent stains and UV damage.
It is certified VOC-free for indoor air quality and is even safe to use around food prep areas, so you can seal your kitchen grout in confidence.
How To Clean Grout
In addition to sealing your grout regularly, you will want to give it the occasional deep clean to remove any stains. It is also a good idea to deep clean your grout a few days before you apply a new coat of sealer.
When it comes to keeping grout clean, the first thing is not to let dirt and liquids soak into the grout. This means cleaning up moisture as it occurs and sweeping regularly to remove debris and dust.
When it comes to cleaning, your best tool is a toothbrush, which is perfect for scrubbing grout lines.
If your grout is pretty clean and you are just sprucing it up before sealing, you can use a mix of just water and standard dish soap. If your grout is stained and you want to remove the discoloration, use a solution that is 50 percent vinegar and 50 percent warm water.
Don’t use vinegar as a regular cleaner, though—reserve it for your pre-sealing clean. This is because vinegar breaks down sealer, so if you clean with vinegar regularly, your grout will become unsealed and more likely to stain.
Rinse grout thoroughly to remove cleaning agents when done, and make sure the grout is completely dry before proceeding with the sealing process.
For advice on cleaning tile floors in general, read our complete guide.
If you are looking for tools to help make the process a bit easier, check out our list of the best tile floor cleaning machines.
FAQs
Yes, it is necessary to seal grout. If you do not, your grout will quickly become discolored and make your floor look old. Worse than that, it can also become a breeding ground for bacteria if exposed to excess moisture.
How Often Do You Need To Seal Grout?
How often grout needs to be sealed depends on its environmental conditions. As a general rule, seal grout at least once a year, and more often if it is in wet conditions such as the bathroom.
How Many Coats Of Grout Sealer Are Needed?
How many layers of sealer are needed depends on how porous the grout is and whether it has been sealed before. Normally, you will want to use at least two layers of sealer.
How Long Does Grout Sealer Last?
Exactly how long grout sealer lasts depends on the sealer and the environmental conditions of the grout. It is a good idea to reseal grout once a year, and more often if it is in a damp location such as a bathroom.
Does Vinegar Remove Grout Sealer?
Yes, vinegar breaks down grout sealer, so if you clean with vinegar regularly, it will break down your sealer over time. For this reason, it is a good idea to reserve your vinegar cleaner for the deep clean before you apply a new coating of sealer.
How Can You Tell If Your Grout Is Sealed?
The simple test to see if your grout is sealed is to flick a few drops or water onto it. If the water remains beaded after a few minutes, your grout is sealed. If the water soaks in after a few minutes, your grout is not effectively sealed.
Is There Grout That Does Not Need To Be Sealed?
Yes, epoxy-based grout is already highly water resistant and does not require sealing. But this is not recommended for all types of tiles. You will usually see epoxy grout with glass tiles.
Can You Regrout Over Old Grout?
Unfortunately no, you can not regrout over old grout. The old grout must be removed before new grout is installed. This can be done by hand or using a small electric grinder.
The Verdict
Sealing your grout isn’t a difficult task, and it is the most effective thing you can do to keep your tile floors looking brand new.
Applying grout sealer at least once a year will protect the grout between your tiles from being discolored by moisture or, worse, becoming a breeding ground for mold.
With the right product the process is quick, easy, and safe, and won’t release any harsh chemicals into your home that you don’t want to be breathing in. So, try one of the three excellent grout sealers we have recommended above.
To apply, simply clean your tiles thoroughly and ensure they are completely dry. Then apply your grout using a brush, wiping up any overspill onto tiles to ensure they are not discolored by the sealer. Wait for it to dry and apply another layer.
What do you use to seal your grout? Do you have any tips and tricks to share? Share your experiences in the comments section below.
Back to Top
Can you use any of the 3 sealers on vinyl that is grouted?
Is there a grout that doesn’t need sealing, like the polymer types of grout?