Due to the pandemic, many consumers are now spending most of their time at home which influenced residential designs. They are developing more interest in creating personalized spaces that reflect their styles instead of focusing on perfection. One such design area is creating tile patterns for floors.
So if you are looking for different types of tile patterns that you can use, we’ve got your back! Our list of 17 floor tile patterns will help you brainstorm ideas to give your floor a unique character.
- #1 Herringbone Bathroom Tile Patterns
- #2 Pinwheel or Hopscotch Tile Pattern
- #3 French or Versailles Tile Pattern
- #4 Windmill Floor Tile Pattern
- #5 Crosshatch or Weave Floor Tile Patterns
- #6 Lacework Patterned Bathroom Floor Tile
- #7 Checkerboard Bathroom Tile Layout Patterns
- #8 Chevron Tile Placement Patterns
- #9 Running Bond or Tiles Brick Pattern
- #10 Corridor Staggered Tile Patterns
- #11 Diagonal or Diamond Tile Pattern Layout
- #12 Stacked Grid Wall Tile Patterns (Straight Lay Tile Pattern)
- #13 Hexagon Tile Patterns for Floors
- #14 Stepped Vertical Brickwork Rectangular Tile Patterns
- #15 Vertical Stacked Tile Pattern
- #16 Soldiered Tile Layout Patterns
- #17 Tic Tac Shower Tile Layout Patterns
- A Helpful Tile Pattern Tip
- Final Thoughts
#1 Herringbone Bathroom Tile Patterns
Create an intricate-looking bathroom design with just one tile size and shape!
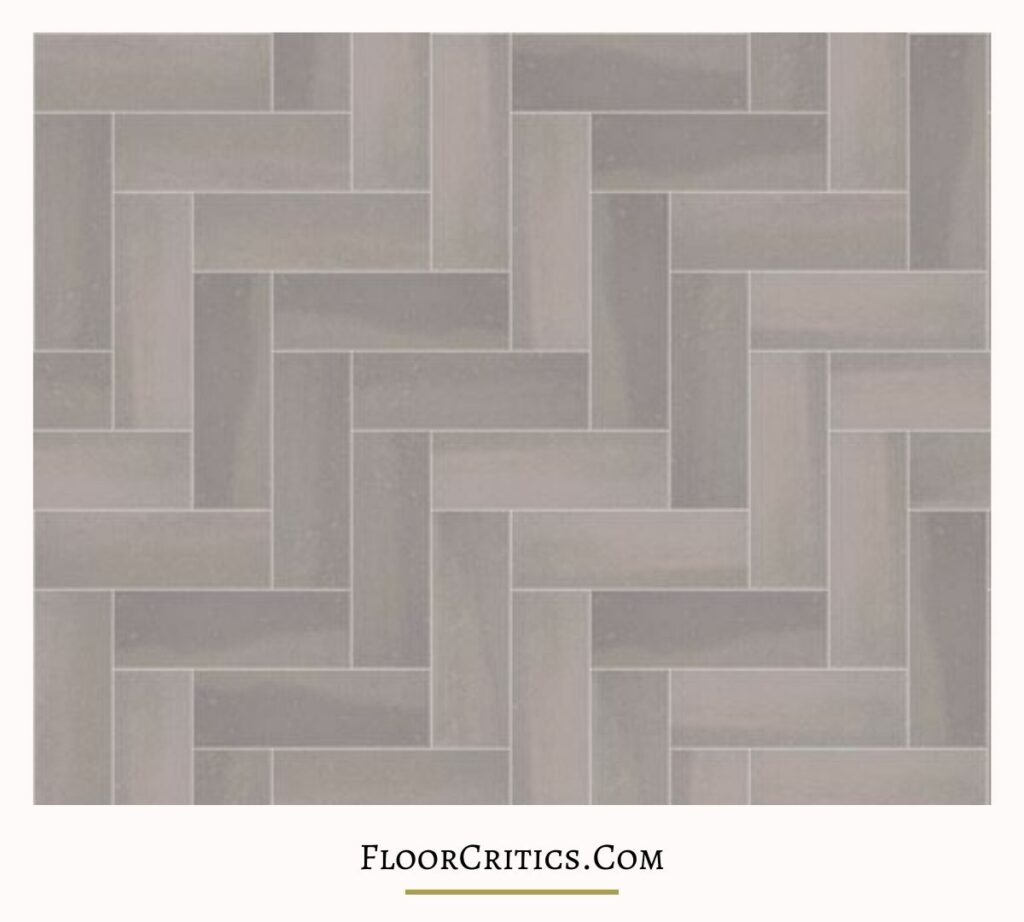
Herringbone tiles are considered the hottest pattern in home design. Known for their zig-zag patterns, you can create them by just using rectangular tiles with the same dimensions.
For floors, you can use any tile dimension but 6” x 12” tiles or smaller are ideal for backsplashes or walls. Better choose a contrasting color for the grout for a bolder look.
It would be best to use this layout in small rooms like bathrooms (too many grout lines can be overwhelming in large spaces).
How to Install
- Start with two tiles and create an L shape.
- Create one more L and place it at the previous L’s joined corner.
- Repeat the pattern until you complete your installation.
#2 Pinwheel or Hopscotch Tile Pattern
Do you prefer a playful flooring design? Try this Hopscotch interlocking tile pattern!
If you are planning to use two different materials to create a varied and dynamic appearance, this layout is for you. It is popular in kitchens and bathrooms to create a decorative style. We recommend using contrasting colors and materials for the best results.
How to Install
- Plan the layout first before installing. Dry fitting without adhesive would reduce any mistakes.
- Use a large square tile and a smaller one half its size (e.g. 12” x 12” and 6” x 6”).
- Create the pinwheel by laying the large tile and then placing the smaller one in its bottom-right corner.
- Line up the next large tile’s bottom on top of the small tile in the previous pinwheel.
- Repeat the pattern until your floor is filled.
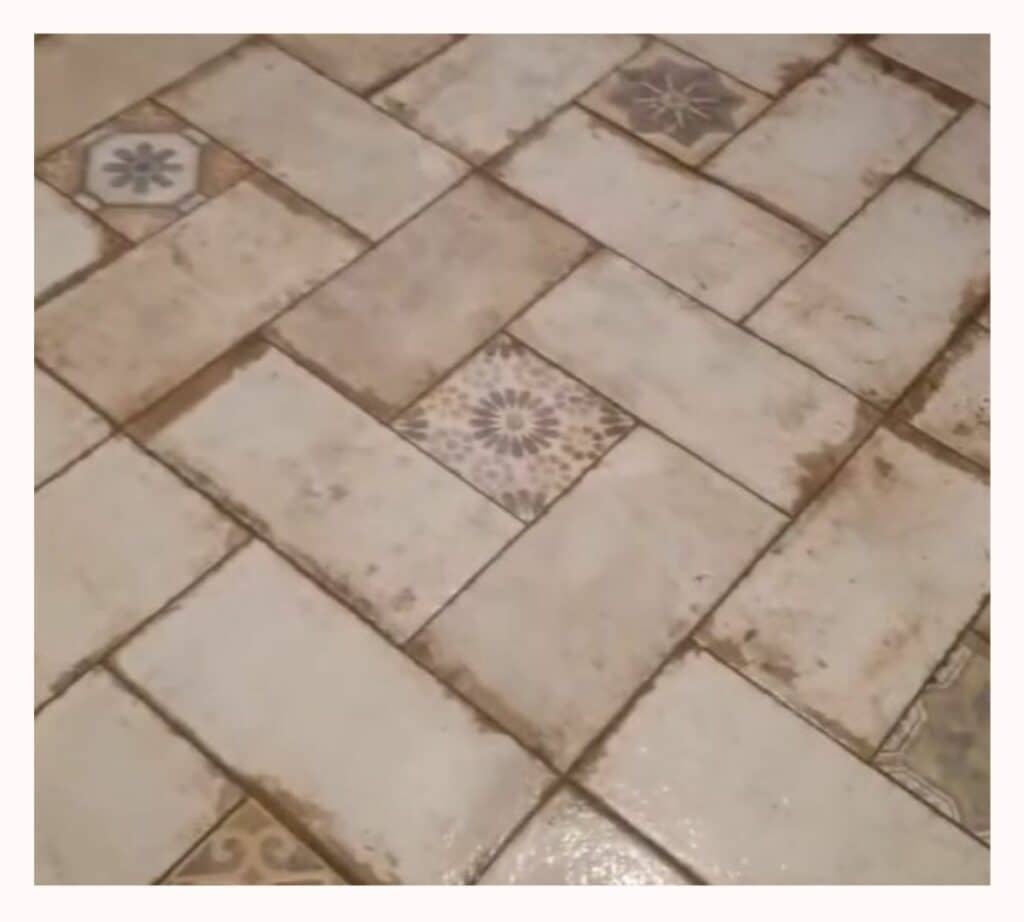
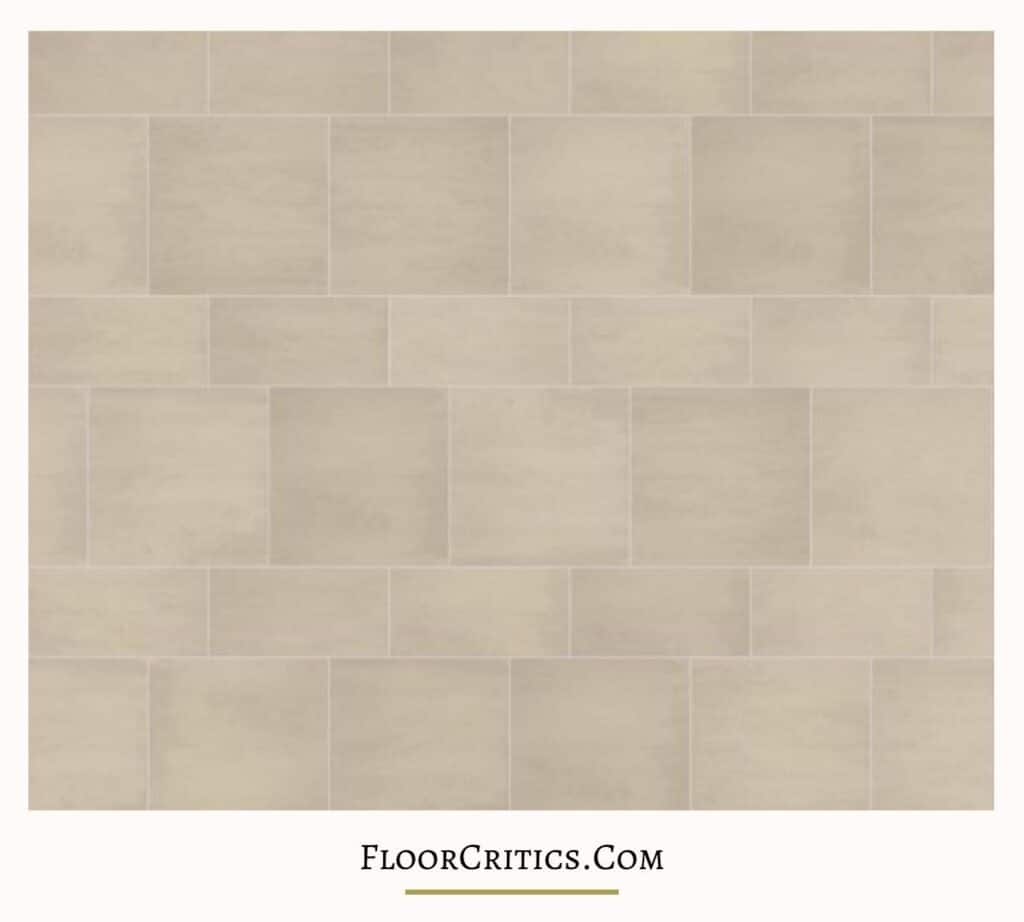
#3 French or Versailles Tile Pattern
Do you love puzzles? Then this puzzle-like layout might get your attention!
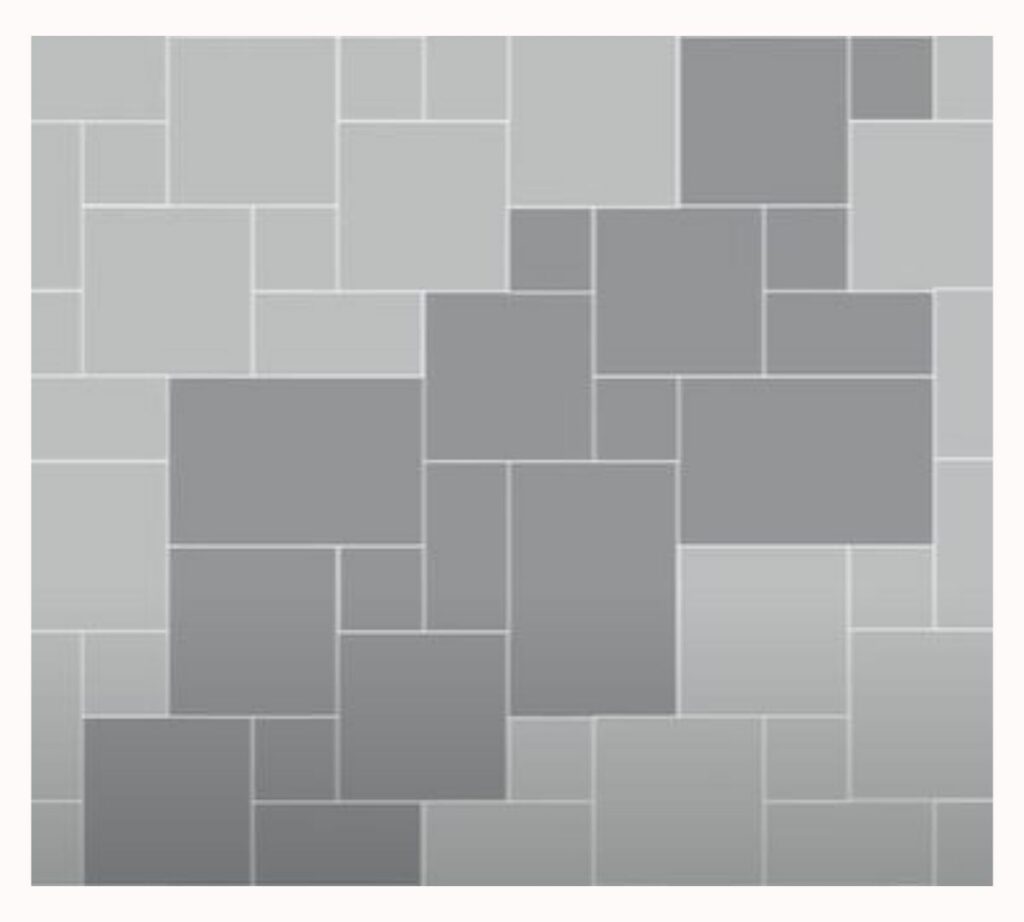
The Versailles pattern uses several tiles (usually four) in different sizes and shapes to form a random appearance. This layout provides several benefits including cost-effectiveness and versatility as you can use it in both small or large spaces. Stone-look tiles such as marble, slate, limestone, travertine, and porcelain create the best matches.
How to Install
- Create one repeatable pattern using the following:
- Two 16” x 24” rectangles
- Two 8” x 16” rectangles
- Four 16” x 16” squares
- Four 8” x 8” squares
- Start laying two large rectangles and three large squares while leaving an “L” gap at the center (see image above).
- Get one small rectangle and one small square to fill the gap.
NOTE: Since you are using multiple tile sizes and shapes, carefully measuring your room might be necessary to get the appropriate proportions of the tiles.
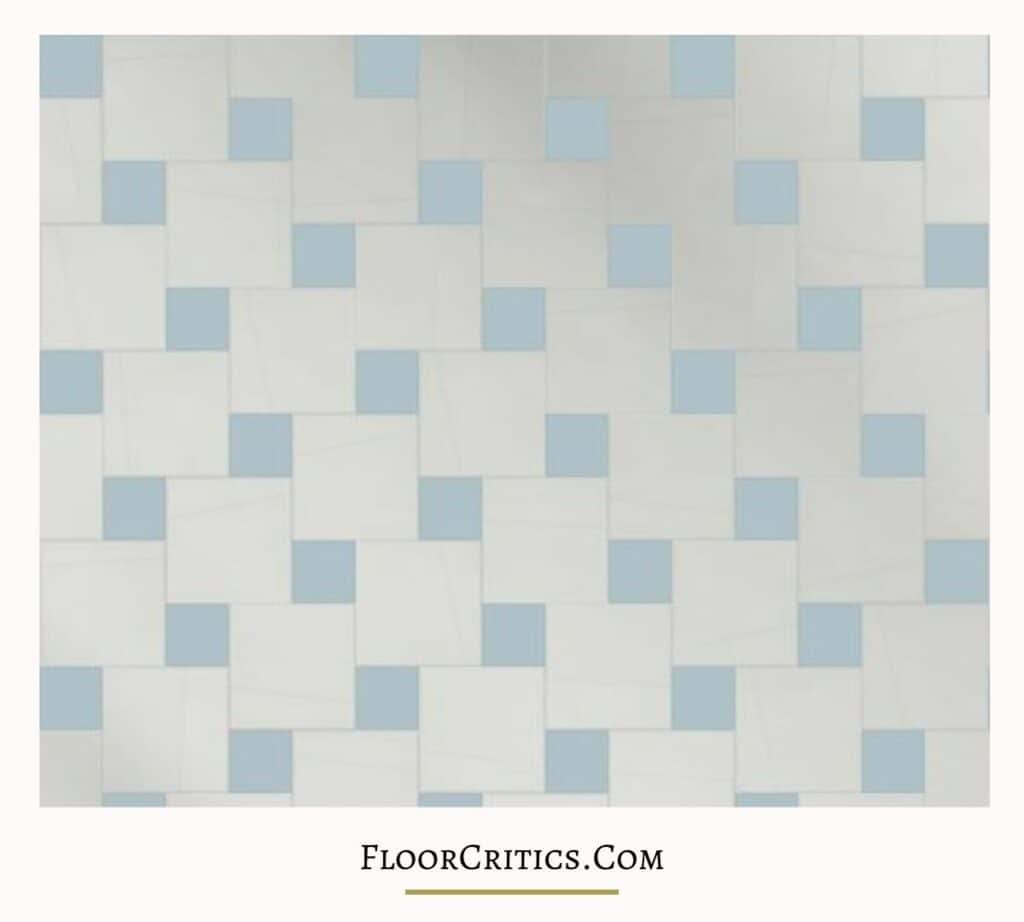
#4 Windmill Floor Tile Pattern
Here’s another fun but simple way of creating an attention-grabbing tile pattern using mosaic windmills!
For a catchy layout for smaller areas (like bathrooms), go for a windmill tile pattern. You can also use it in areas with minimal decors to enhance their look.
How to Install
You just need a small square tile and create a border around it using four rectangular tiles. Better use designer tiles for the squares and monochromatic designs for the rectangles.
#5 Crosshatch or Weave Floor Tile Patterns
Get a classic geometric tile pattern with the look of a herringbone floor but without the complexity involved!
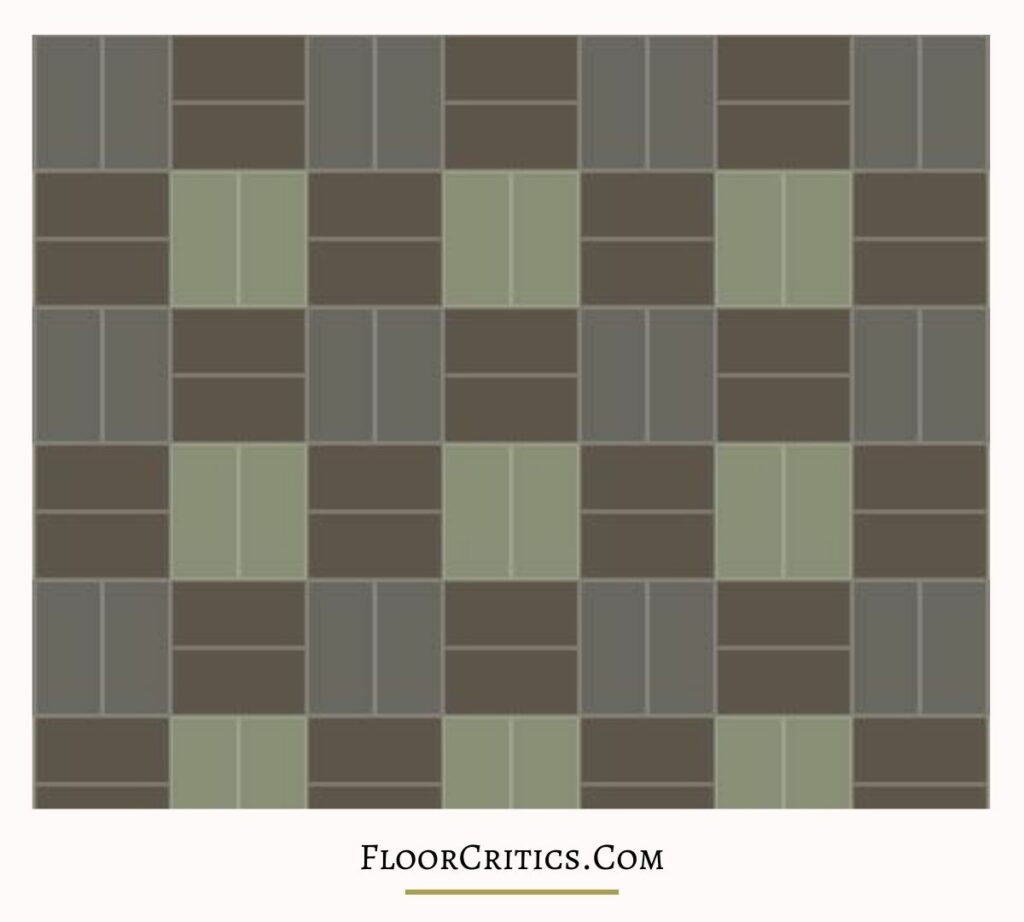
You only need one tile shape and size to create an interesting weave pattern for your floor. Although there are many ways you can make weave-like patterns, the easiest way is by using 6” x 12” rectangular tiles. But if you prefer a more fabric-like layout, you can use ultra-thin tiles.
How to Install
- Line up your rectangular tiles to make a square.
- Flip the tiles’ direction in the next row.
- Continue with this pattern to “weave” your tiles.
#6 Lacework Patterned Bathroom Floor Tile
Go with a more delicate design resembling lace fabric for your minimalist bathroom or kitchen!

This combination of rectangles and squares work hand in hand to form a lacework pattern that emphasizes a line’s mesh. If you want to use a single tile for the whole pattern, you can simply use subway tiles and cut some to make the squares.
How to Install
- Create alternating patterns of the rectangle and squares for each row.
- Offset each row so that the edges of the long and short tiles align. (They should form a 45-degree angle.)
#7 Checkerboard Bathroom Tile Layout Patterns
Have a versatile and timeless flooring that can complement modern spaces with this checkerboard tile pattern!
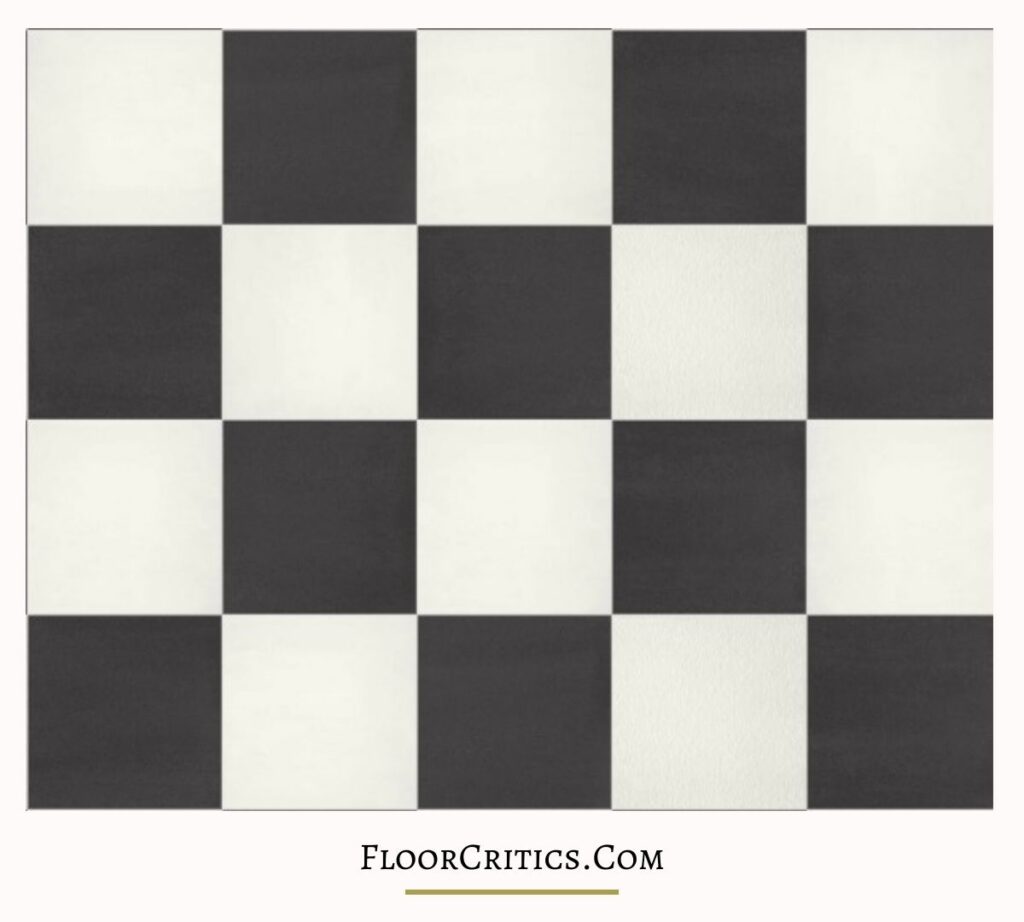
A simple design for classic lovers, the checkerboard pattern is great for your bathrooms as well as for urban lofts and farmhouses. You just need two different tiles of the same size, but the most basic ones are black and white tiles. Using gloss and matte finishes is also great to add some style to your design.
How to Install
- Create the pattern by alternating the two different tiles horizontally and vertically. As simple as that.
#8 Chevron Tile Placement Patterns
Lay out a trendy flooring that will surely be worth your effort with a chevron-style pattern!
Similar to the herringbone pattern, the chevron pattern has uninterrupted zigzags without angled ends. So, they will require more effort because you need to cut long rectangular tiles to create the pattern. Plain is the simplest way to go, but you can also mix tile texture, finishes, and colors for more detail.
How to Install
- Cut both ends of the rectangular tiles at 45 degrees to create parallelograms.
- Create a zig-zag pattern by lining the cut tiles end to end.
Tip: Cutting tiles can be costly and time-consuming. Just look for angled tiles to save yourself from the hassle of cutting them. Some manufacturers also offer large tiles designed for creating chevron patterns.
#9 Running Bond or Tiles Brick Pattern
Add an industrial atmosphere to your home and cover minor flaws using a staggered brick layout on your floors or walls!
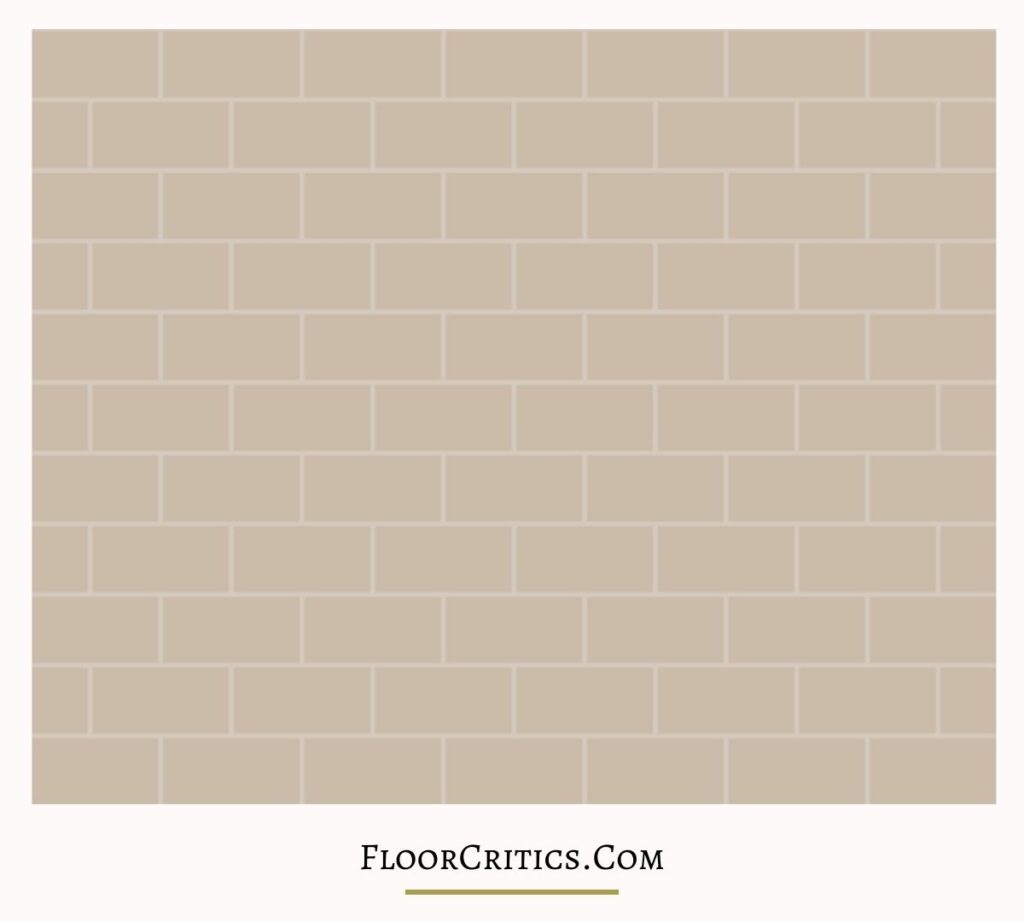
Often chosen to hide distorted walls or break up existing decor patterns, a running bond layout will look best when used with wood-look ceramic tiles. There are many ways you can create this pattern, but a 50% offset is what we call the original brickwork.
Though a horizontal or vertical layout is common, you can angle your tiles at 45 degrees to give more “traffic” flow to your flooring.
How to Install
The running bond pattern can be done in three major variations:
- 50/50 (½) Offset
- Each tile below starts at the top tile’s center.
- Not ideal for longer planks and tiles.
- 40/60 (⅓) Offset.
- The top tile starts at the ⅓ part of the bottom tile.
- Ideal for large and multi-colored tiles as well as wood-look planks.
- 30/70 Offset
- Best for creating a more authentic staggered look.
TIP: You can choose random offsets to create the effect of a waterfall.
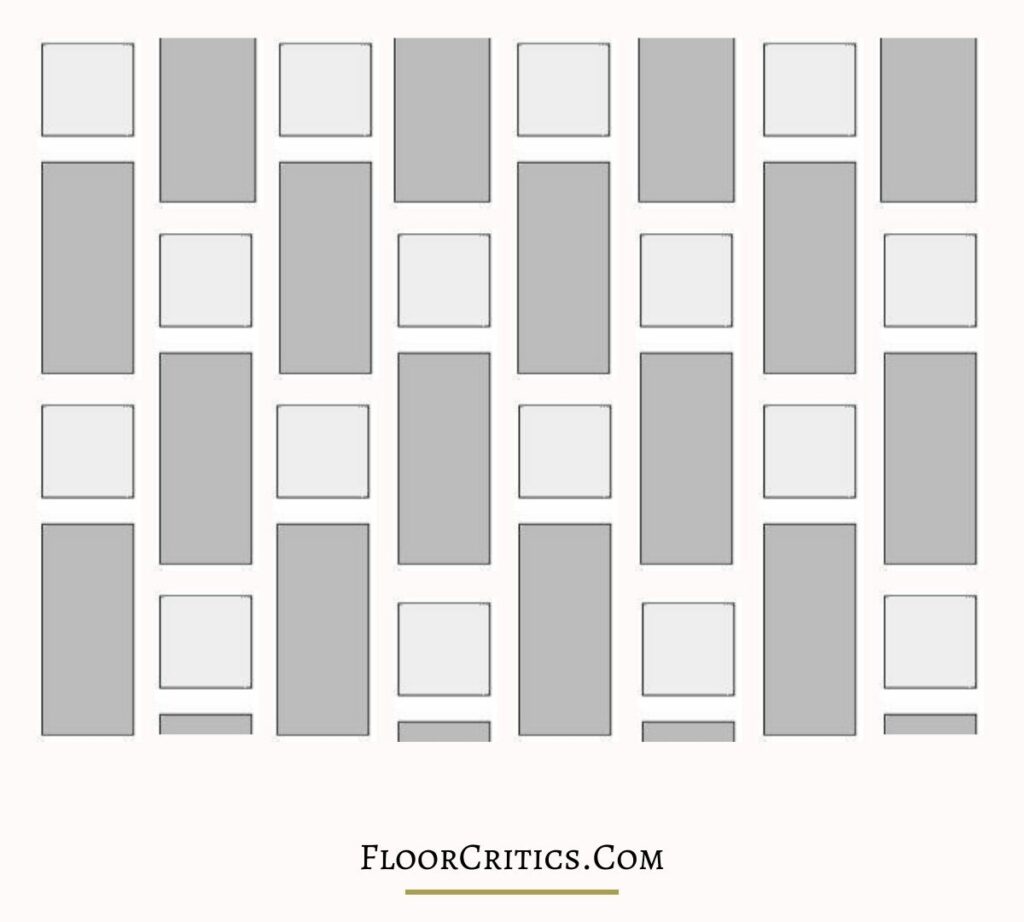
#10 Corridor Staggered Tile Patterns
Try a flooring stagger pattern for a classy yet simple tile layout to add life to boring spaces!
The design might look complicated, but you only need square and rectangular tiles for this one. You can choose any size according to your preference, or you can purchase one type of tile and cut them into various sizes.
How to Install
- Create one row of rectangles and another for squares. You can also alternate the rectangles’ orientation on the rows for more style.
#11 Diagonal or Diamond Tile Pattern Layout
Make your rooms appear wider with a wall designed with diagonal/diamond-style tiles!
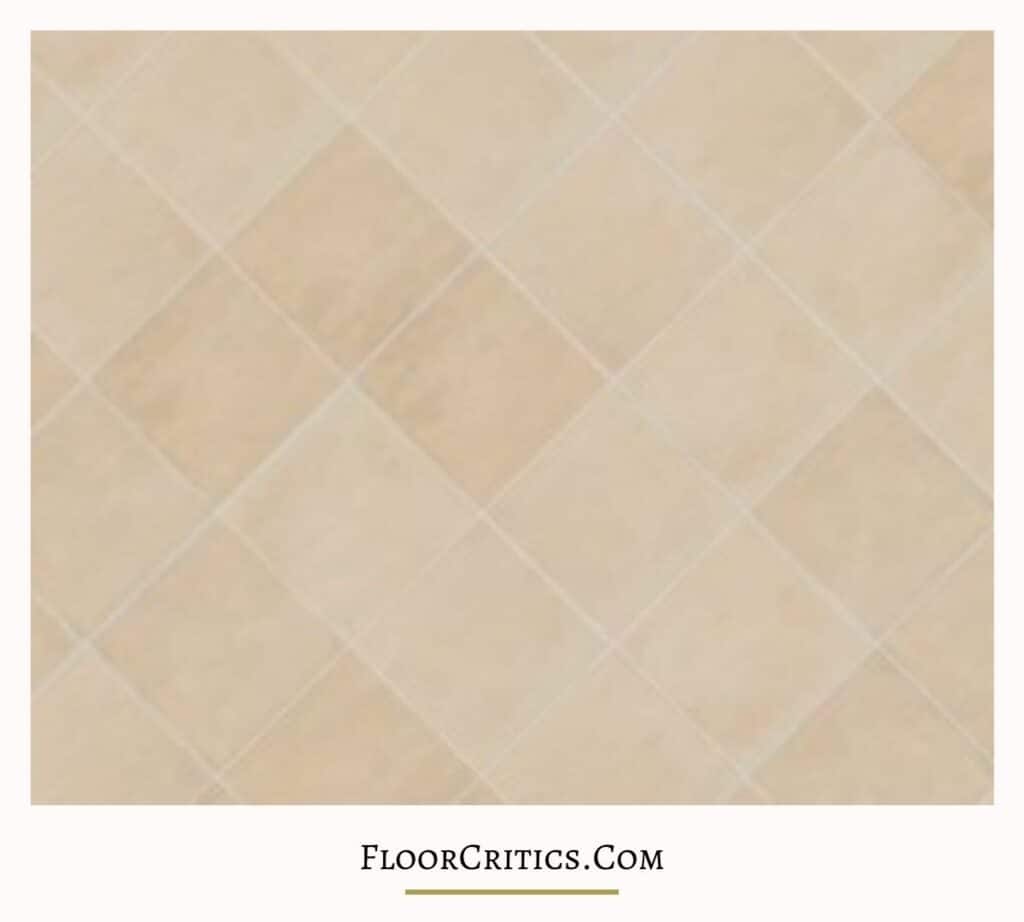
Whether for walls or backsplashes, the diagonal design can improve the look of tiny bathrooms, small kitchens, or create movement on straight hallways. However, take note that diagonal patterns will need more cutting once you reach the corners of your room.
How to Install
- All you need to do is place square tiles on your wall and create diamonds by angling the tiles at 45 degrees.
#12 Stacked Grid Wall Tile Patterns (Straight Lay Tile Pattern)
If you love the elegance found in simplicity, go for classic tile installation patterns such as this one!
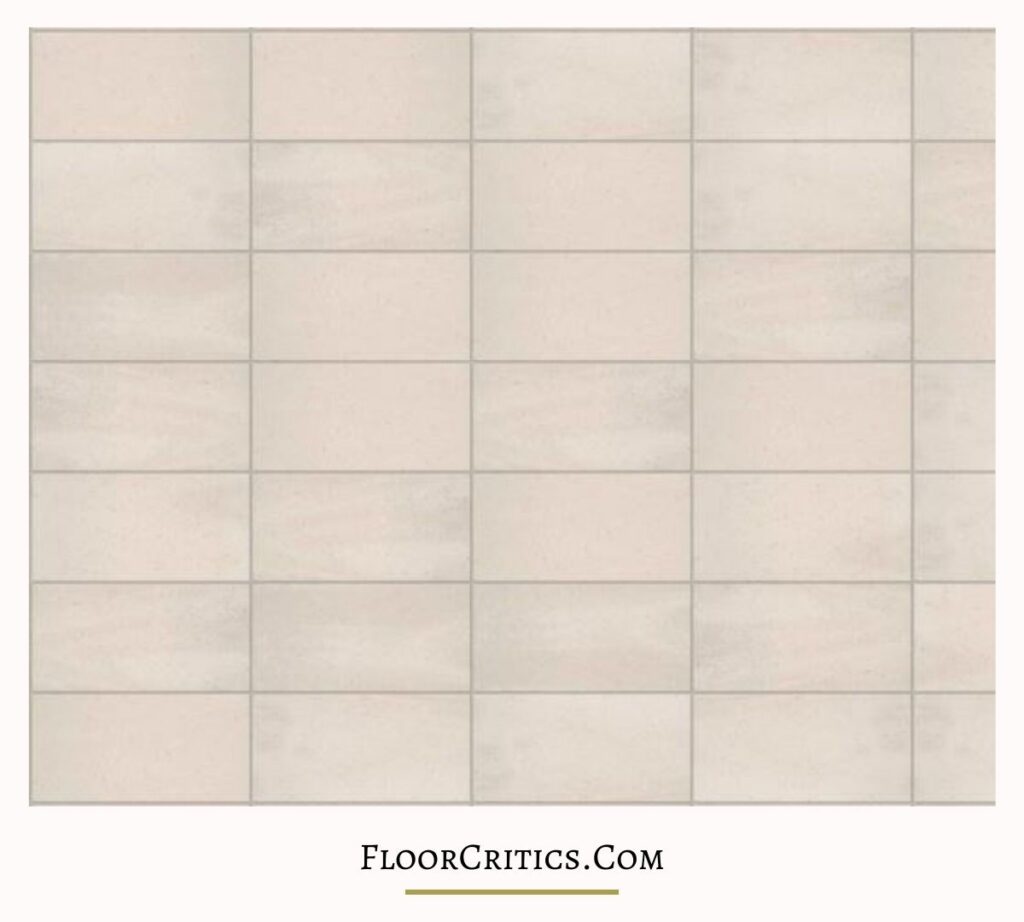
The straight lay grid pattern involves laying tiles of the same color with matching corners. Since the layout can look dull when used with neutral tiles, you can incorporate color or stripes to make it more interesting. Square tiles will look clean and simple, but rectangular tiles will look more modern.
How to Install
Just choose any size of rectangular or square tiles, align the tiles’ edges to create a clean grid, and you’re done!
#13 Hexagon Tile Patterns for Floors
Use a mixture of plain and patterned or colored hexagon tiles to make a stunning feature on your floors or walls!

To get the best effect, use contrasting textures and colors for this pattern. More creative designs would involve mixing tile shapes and colors like non-linear transitions from planks to hexagons.
How to Install
- Laying out the hexagon tiles is easy once you have chosen your desired look. Just lay each tile side by side if you prefer a traditional look. Or, you can experiment with various hexagon patterns like waves, flowers, concentric honeycombs, and more.
#14 Stepped Vertical Brickwork Rectangular Tile Patterns
Have fun with large rectangular tiles and create a modern but familiar flooring design that can make rooms feel larger!
This is a combination of stepped brickwork and a vertical look that are best for giving life to large rectangular tiles. While standard brickwork layouts create a balance in the offsets between each row, stepped brickwork emphasizes flow. This means that it uses incremental offsets to create a “step” pattern to show movement.
How to Install
- Align the rectangular tiles vertically to create the first row.
- “Step” or push the succeeding rows forward.
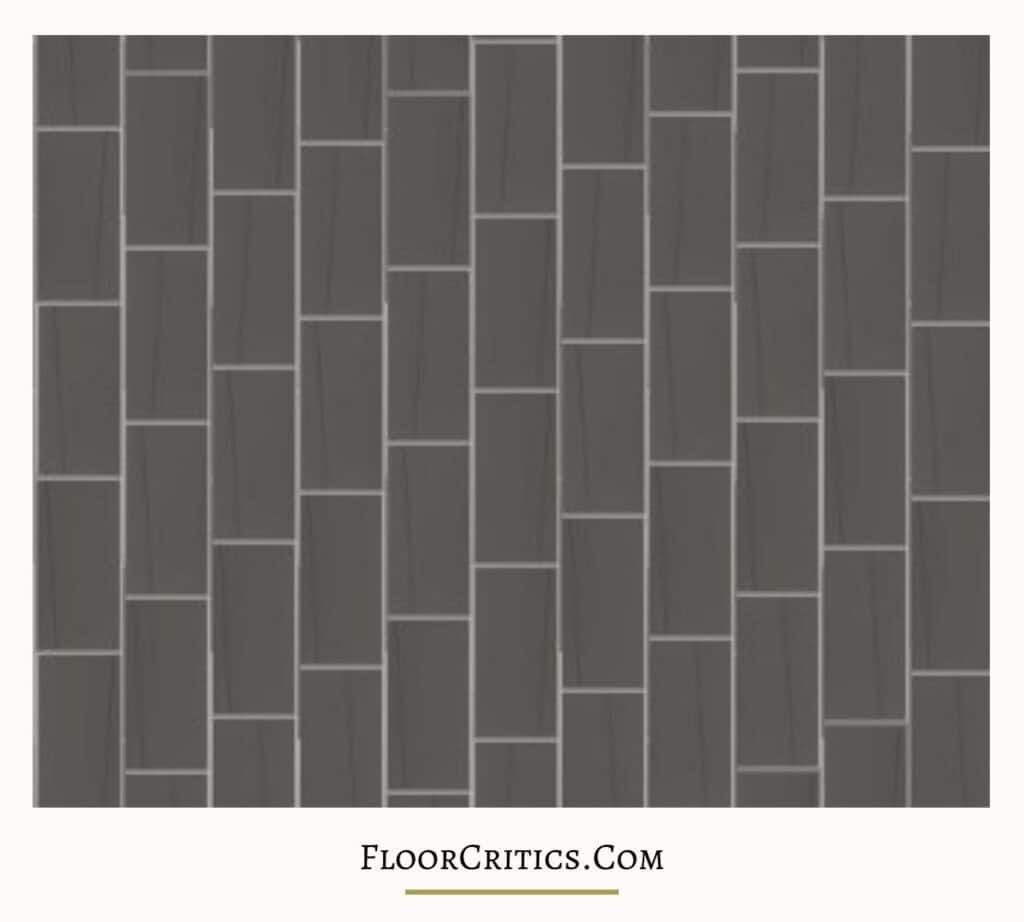
#15 Vertical Stacked Tile Pattern
Emphasize the height of any space by creating the illusion of taller walls with vertically stacked tiles!
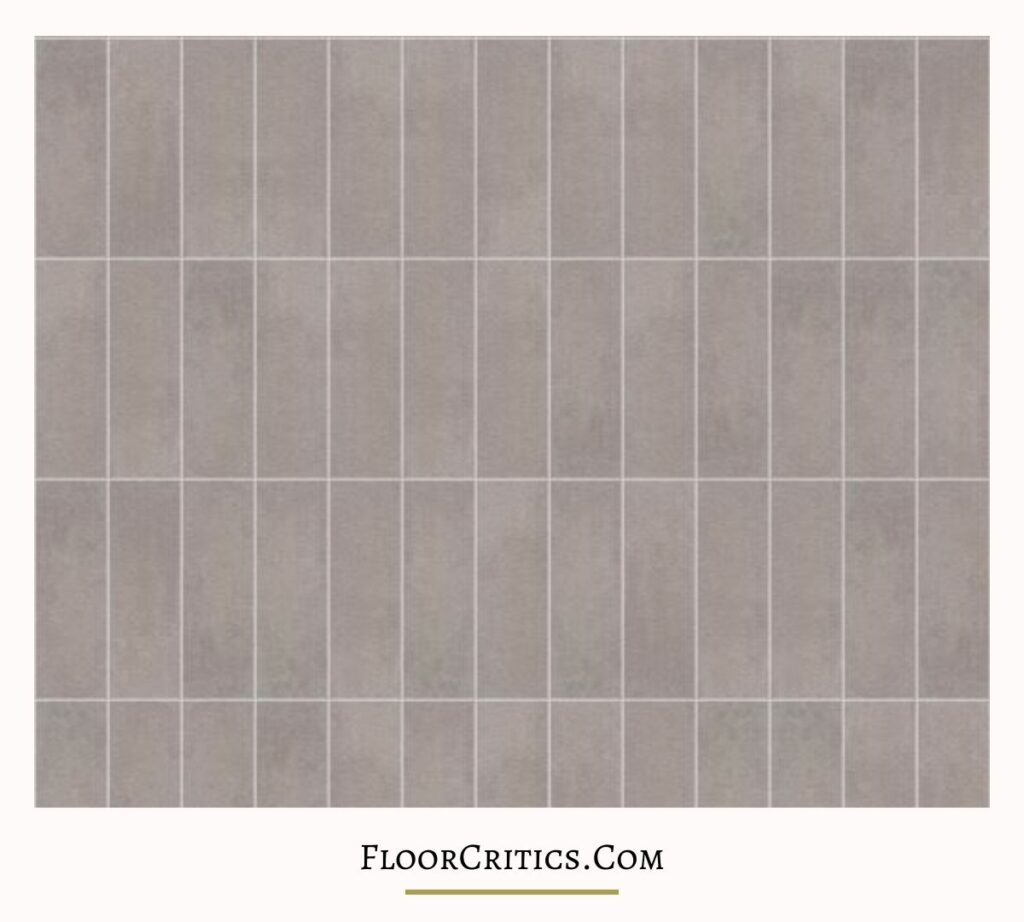
This pattern can add a geometric appeal to light-colored subway tiles, especially if you use textured designer tiles. It does good in extending your floor and walls. Also, it is pretty straightforward to install and is best for minimalist people.
How to Install
- Just stack rectangular tiles vertically and you’re good to go.
#16 Soldiered Tile Layout Patterns
Try a dynamic and more detailed look without the need for a complex installation through a traditional windmill-like layout.

This layout looks like the windmill pattern, except the square at the center is larger. Also, the borders are made of smaller squares and rectangles. Thus, making a modern look that doesn’t sacrifice the traditional look of the windmill pattern.
How to Install
- You will need the following to create one soldiered pattern:
- 1 large square tile
- 1 smaller square tile half the larger one’s size
- 1 rectangular tile
The recommended tile sizes are 12” x 12”, 6” x 6”, and 6” x 12” for a polished look.
- Create a border of alternating small squares and rectangles around the large square.
#17 Tic Tac Shower Tile Layout Patterns
For a simple yet sophisticated look in your shower room, create an appealing tile layout with alternating “dashes and dots”!
Depending on your personal taste, you can do a horizontal or vertical tic tac tile layout. But, vertical orientation is better in making your room look larger and taller. For more contrast and depth, choose a tricolor scheme.
How to Install
- Use one rectangular and one square tile of the same width or you can use any two tiles with different heights but with equal widths. (e.g. 6” x 20” and 6” x 6” tiles)
- Alternate the two tiles to create one row.
- Offset each row by ⅓.
Tip: Longer rectangular tiles will look better.
A Helpful Tile Pattern Tip
Not all houses are square, so using a level before installing your tiles on walls can prevent slanted outcomes. For floors, plan where you will be doing the cuts. Instead of going from a large tile to a smaller cut piece, gradually decrease the tile’s size until you reach the corner. The effect done by this will be less noticeable compared to a sudden change in tile size.
Final Thoughts
Here, we’ve given you different tile patterns for floors to guide you in finding the one that best matches your personal style. Hopefully, our list was able to bring out your creativity and help you find a trendy tile pattern to improve the look of your home. Drop us a message if you need help with your tile flooring installation and we’ll be glad to assist you!
Back to Top