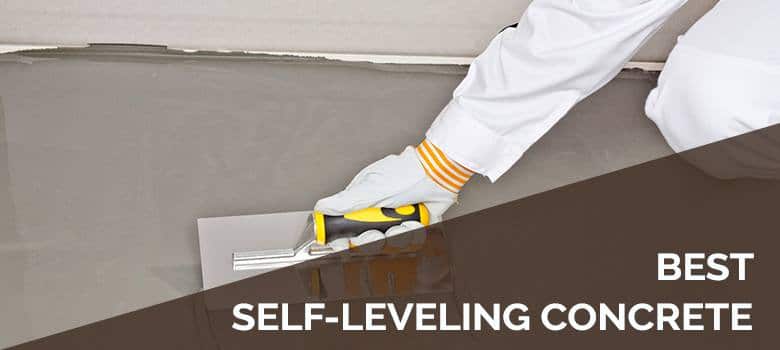
Looking to renovate your floors, but worried about the state of your underlying floor and the costs that will be involved in leveling it out? Any experienced home DIY enthusiast should be able to level their own floors with self-leveling concrete.
Self-leveling concrete is a polymer-modified concrete that is highly viscous. You pour it over the floor like a thick liquid, and let it run into corners and across the floor to create a flat and even surface, with minimal effort.
It is ideal for flatten existing hard floors, such as concrete, tile, and plywood, before installing new interior flooring, such as LVP, tiles, or wood, in the home.
But just because self-leveling concrete is easier to use than the traditional stuff, doesn’t mean that things can’t go wrong. Mixing can be challenging, the window to pour correctly before setting is short, and the appropriateness of options for different environments are not easy to get right. There are lots of things that can go wrong with this home DIY project.
Read on to find out everything you need to know about self-leveling concrete and how to use it. Also, check out our list of reviews of the five best self-leveling concretes for home DIY projects.
- Advantages Of Self-Leveling Concrete
- Disadvantages Of Self-Leveling Concrete
- Different Types Of Self Leveling Concrete
- 5 Best Self Leveling Concrete Reviews
- How To Install Self-Leveling Concrete
- Product Safety Precautions
- FAQs
- The Verdict
Advantages Of Self-Leveling Concrete
There are a variety of advantages to using self-leveling concrete rather than calling in a professional to level your floor using traditional concrete, and it is not just the money you could save. In fact, your professional builder may well use self-leveling concrete themselves to complete the task.
- Self-leveling doesn’t require the addition of water to be placed, which means less mess and fuss, and you are less likely to overwater your concrete.
- Self-leveling concrete creates a highly smooth surface that is also high-strength. While this makes it the ideal underlay for other floorings, the floor is also smooth and strong enough to stand alone as a flooring option.
- Self-leveling concrete can not only be used for leveling concrete, but can be laid on top of any non-flexible surface, such as ceramic tile, LVP, wood, or plywood.
- Self-leveling concrete is easy to use, so even amateurs can successfully level their concrete floors with the product.
- Self-leveling concrete results in a concrete stronger than normal concrete, which means it is ideal for reinforced concrete construction.
- Self-leveling concrete is very unlikely to cause allergic reactions. This is in contrast to regular concrete, which can cause a chromium allergy in workers, resulting in occupational asthma.
- Self-leveling concrete is also more resistant to mold growth in wet conditions than regular concrete.
- Self-leveling concrete dries extremely fast, which means less time to wait for your next steps (and fewer opportunities for anyone to put a footprint in your work).
Do You Need Help Finding a Durable Product With Great Value? Get In Touch!
Talk To A Floor Critics ProDisadvantages Of Self-Leveling Concrete
While there are a huge number of advantages to self-leveling concrete, every product has its drawbacks and things to be wary of when working with it:
- Self-leveling concrete dries very fast, which means that you need to work with it quickly. Depending on the product and the conditions, you can have a little as 20 minutes to mix, pour, and finish your surface.
- Self-leveling concrete does nothing to reinforce the underlayer on which it is laid. If anything goes wrong with the subfloor, the self-leveling concrete can loosen, which will also result in damage to anything that is laid on top of it.
- Self-leveling concrete can stick firmly to tools and any other surface that it is splashed against. All these items need to be cleaned immediately in order to ensure they are not permanently stained.
Different Types Of Self Leveling Concrete
There are two different types of self-leveling concrete: acrylic-based and water-based.
Acrylic Self-Leveling Compound
Acrylic self-leveling compound is made from mixing acrylic liquid polymer and cement powder. It results in a floor that is relatively elastic (for concrete) and is resistant to scratches and abrasions. It takes longer to dry than the other type of self-leveling concrete.
Water-Based Self-Leveling Compound
Water-based self-leveling compound uses water as its lubricant, resulting in a surface that has a consistency more in line with normal concrete. It dries very fast, and can dry in as little as 20 minutes. You usually buy this in powder form and mix in water to create the concrete.
5 Best Self Leveling Concrete Reviews
There are a wide range of self-leveling concretes available, which can be purchased from most home improvement stores. But let’s take a closer look at five of the best self-leveling concrete brands.
- Akona – Best Overall Floor Leveling Compound
- Sikafloor – Best Acrylic Concrete Floor Leveler
- Henry – Best Leveler For Thickness
- LevelQuick – Best Leveler For Final Surface
- Mapei – Best Value For Money Leveler
Need Help Finding a Trusted Flooring Professional In Your Area?
Let Us Help You!
Get a Local Flooring ProAkona – Best Overall Floor Leveling Compound
Akona’s self-leveling compound is a water-based product you can mix yourself by just adding water, as primer has already been added to the mix. It is designed for interior application only and can be laid to a thickness of ⅛ of an inch to one inch.
Quick-drying, floor coverings can be laid on top of the created surface after just 24 hours. This product is particularly recommended if you are looking to encapsulate radiant heating installations. It can protect cables and tubes and even help heat be more evenly distributed.
You can expect this compound to set within 10 to 20 minutes of being laid. One 50-pound bag, which costs around $35, should cover 50 square feet when poured at ⅛ inch thickness.
Sikafloor – Best Acrylic Concrete Floor Leveler
Sikafloor is an acrylic self-leveling compound that comes in both standard and Latex variations for an extra supple surface. It can be laid thinner than the other options on this list, spreading as thin as 1/25 inch, or as thick as 1 ½ inch.
This acrylic option has a longer initial set time or about two hours, but it will still be possible to walk on the floor after about four hours.
A 50-pound bag will cover around 50 square feet at ⅛ inch thick and it costs around $30. Primer should be applied to the floor separately before the mixture is poured.
Henry – Best Leveler For Thickness
Henry 565 Floor Pro is another water-based compound that comes in powder form, and you just need to mix with water, pour, and spread. Fast-drying, you can start laying ceramic tile just six hours after installation and other floorings after 16 hours.
This product is ideal if you are dealing with deeper crevices in your floor, as it can be laid up to five inches thick. It can also be laid over concrete, ceramic tile, and wood.
Unlike with Akona, Henry 565 does not come with a primer included, and a primer layer should be distributed prior to pouring. Henry recommends their own 564 FloorPro Underlayment Primer.
A standard 40-pound bag costs around $40 and should cover 44 square feet at ⅛ inch thickness. You can expect this compound to reach its initial set within about 30 minutes depending on conditions.
LevelQuick – Best Leveler For Final Surface
Another water-based compound. LevelQuick RS is another self-leveling concrete you can buy in powdered form and create your pouring compound by mixing in water.
Specifically designed to be applied in just one pour, it can be laid to a thickness of 1 ½ inches. Unlike most of the other compounds on this list, which are not recommended to the final floor surface, LevelQuick results in a floor that is appropriate for both home use and commercial use in locations such as flood plants, breweries, and kitchens.
You can expect LevelQuick to set within 20 minutes of being laid, and a standard 50-pound bag will set you back around $35. Floors should be separately prepared with a primer prior to pouring the cement.
Mapei – Best Value For Money Leveler
Mapei Self-Leveler Plus is one more water-based leveler on this list. It is highly affordable at just $30 for a 50-pound bag, though, unlike with Akona, a separate primer is required.
Designed for indoor floors, this compound can be laid from ⅛ inch to 1 inch thick. The surface will be ready to receive ceramic tiles after 24 hours and other types of flooring after 48 hours.
A 50-pound bag costs about $30 and will cover 48 square feet at ⅛ inch thickness. The initial set will usually happen within 10 to 15 minutes.
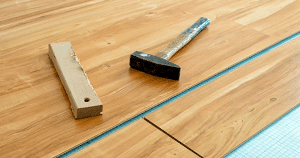
How To Install Self-Leveling Concrete
Self-leveling concrete is the kind of thing that you can pour yourself, as you don’t need a trained and professional eye to get your floor perfectly flat and even. The product will do that for you. But that doesn’t mean it isn’t complex. It requires preparation and having everything you need to plan, as the window of time for the concrete to reach its initial set is small.
Preparation
- The first thing to do is to prepare your surface to ensure it is stable, solid, and clean. This involves clearing any debris and ensuring there are no joints or substantial cracks. The self-leveling concrete will cover these issues, but will do nothing to correct them.
- To prevent the self-leveling contrate form moving to unwanted areas create 1″ X 2″ lumber damns with the edges wrapped in duct tape.
- 24 hours before the product is used, acclimate the water and power to 65-75 degrees Fahrenheit.
- While some self-leveling concretes will include a primer, the majority do not, so floors will need to be primed. Consult your product instructions to see what primer is most appropriate for the product you are using and the type of floor you are installing on.
Concrete Surfaces
- Surface must be cured for at least 28 days minimum.
- Remove and dirt, oil, grease, or other adhesives that could lessen adhesion.
- Surface should be roughened to ensure proper adhesion. Techniques such as shotblasting or sanding can be used.
Plywood Surfaces
- Ensure a clean surface free or dirt, oil, or paint.
- Allow a 3mm gap between sheets
- Fasten a metal or plastic lath every 4-6″ before applying the self-leveling concrete.
Mixing
- Make sure all storage containers, tools, and water are clean.
- Use a 5 gallon pail, mix the self-leveling concrete with cool water for two minutes using a 400-600 RPM drill.
- Important: avoid adding more water or over mixing the product. If you see a white film begin to form, this means overwatering has occurred.
Application
- Apply the self-leveling concrete to a floor temperature between 60-80 degrees Fahrenheit.
- Pour the material onto the floor in a uniform and even manner.
- Use a trowel to push the compound into areas that are not being evenly covered.
- If more concrete is needed over an existing pour, wait 24 hours.
- The product will be fully set and hard after about 2 hours and can then accept foot traffic.
- Wait 72 hours before installing flooring (refer to the product sheet for exact time)
Do You Need Help Finding a Durable Product With Great Value? Get In Touch!
Talk To A Floor Critics ProCuring
- Curing compounds should be avoided.
- Ensure the HVAC is turned off and the area is not exposed to direct sunlight.
Product Safety Precautions
Self-leveling concrete formulas have improved a lot in recent years, and they are now safer and easier to use than ever. But there are still some limitations that should be considered.
- The most likely hazards form self-leveling concrete are burns from dust in the eye or skin irritation.
- Protective gear should be worn (water resistance gloves and goggles) to prevent the concrete from coming into contact with the eyes. If eyes are exposed, they should be cleaned with water and medical attention sought.
- Prolonged contact with the skin can also be detrimental, and exposed skin should be washed as soon as possible. Clothes should also be thoroughly cleaned before worn again.
- Inhaling the product can also irritate the lungs. If you start coughing or sneezing, leave the vicinity of the concrete.
- Temperatures can adversely affect how the concrete sets. It does best in temperatures between 65 and 80 degrees Fahrenheit (18 to 29 degrees Celsius).
- Self-leveling concrete should only be used indoors.
- Self-leveling concrete can fill gaps, but should not be used on surfaces with an incline of more than 0.5%, as this will undermine the way the substance disperses.
- Store in a cool, dry place with no exposure to direct sunlight.
- Use product within 1 year of purchasing
Need Help Finding a Trusted Flooring Professional In Your Area?
Let Us Help You!
Get a Local Flooring ProFAQs
How thick you can pour self-leveling concrete depends on the specific product used. But standard thicknesses are between ⅛ inch and 1 inch. However, it is possible to get options that pour as thin as 1/25 inch and as thick as 5 inches.
How Much Does A 50 Lb. Bag Of Self Leveler Cover?
A 50lb. bag of standard self-leveling concrete should cover around 50 square feet at ⅛ inch thickness.
How Does Self-Leveling Concrete Work?
Self-leveling concrete is highly viscous, so it does not need to be spread with a trowel. Instead it can be poured into a space and will fill gaps like a viscous liquid, creating a smooth surface. The cement is designed to dry quickly after pouring and to set stronger than standard concrete.
Do I Need To Prime Concrete Floor Before Leveling?
Most self-leveling concrete manufacturers will advise you to prime concrete flooring before applying the leveler compound. Some brands will come with a primer included in the mix, so there may be no need to add an additional priming layer.
Can You Put A Second Coat Of Self-Leveling Concrete Down?
Yes, it is possible to lay a second layer of self-leveling concrete once the first layer is fully set and dry. Primer should be used before pouring just like with any concrete floor. It is best to wait 24 hours.
The Verdict
Self-leveling concrete is a useful tool when it comes to fixing up uneven internal floors ready for new flooring to be laid down on top. It is easy to use, so most experienced home DIYers should be able to do the job, saving significant money.
The key to doing it right is to get your concrete to the right level of viscosity when mixing with water. It is this that allows the compound to spread evenly and create a flat and consistent surface.
The other thing to bear in mind when you start working is you need to work quickly. Once you stop mixing the mixture and start pouring, you can have as little as 10 minutes before the leveler compound reaches its initial set. Once it starts setting, it can be challenging to fix mistakes.
If you have any comments or first-hand experiences with self-leveling concrete, please post them below or share your pictures via our social media.
Back to Top